Atari SIO23v3
author: mozzwald
2 layer board of 1.16 x 1.00 inches (29.4 x 25.4 mm)
Uploaded:
February 06, 2017
Shared:
February 21, 2017
Total Price:
$5.75
Description
The Atari SIO port runs at a 5V logic level. This board does down level shifting for connecting the Atari Data-In, Data-Out and Command lines to a microcontroller, Raspberry Pi or other device using logic levels less than 5V.
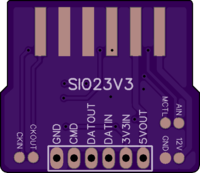
The board fits like an edge connector in between the two rows of pins in the Atari SIO port and is modeled after the Atari8Warez “Poor Mans SIO Cable”. The side labeled “SIO23V3” is the top/up side.
OSHPark boards are only 1.6mm thick which requires adding solder to the Atari SIO pads so they make contact with the pins. I don’t know exactly how much is needed, but it took several tries of adding more to get it just right.
So far, I have tested this board on my Atari 400 connected to an ESP-01 (esp8266, 3.3V). The Atari 400 5V output was able to keep the ESP-01 powered (thru a 3.3V voltage regulator) and connected to a bbs via telnet over Wifi using this modem emulator code.
Part List
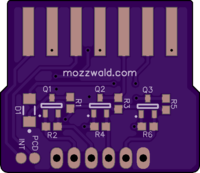
- D1: LL4150GS18 (or comparable)
- Q1-3: DMG2302U (or comparable)
- R1-R6: 10K 0603 5%
- 6 pin 0.1"/2.54mm Header (or directly soldered wires)
Pin Description
- GND: Ground
- CMD: Atari SIO Command Pin (level shifted)
- DATOUT: Atari SIO Data Out (to device RX, level shifted)
- DATIN: Atari SIO Data In (to device TX, level shifted)
- 3V3IN: Low voltage input (device logic level)
- 5VOUT: Atari 5V/Ready Output (can be used to as supply for low power microcontroller, current limit unknown)
Test Points/Pads
The remaining pins on the Atari SIO port are routed to test point pads on the board for experimenation. Keep in mind, these pads are directly connected to the Atari (no level shifting).
- CKIN: Clock In
- CKOUT: Clock Out
- MCTL: Motor Control
- AIN: Audio In
- GND: Ground
- 12V: +12V (Atari 400/800 only)
- INT: Interrupt
- PCD: Proceed

