Mosfet Jr R2
author: MakersBox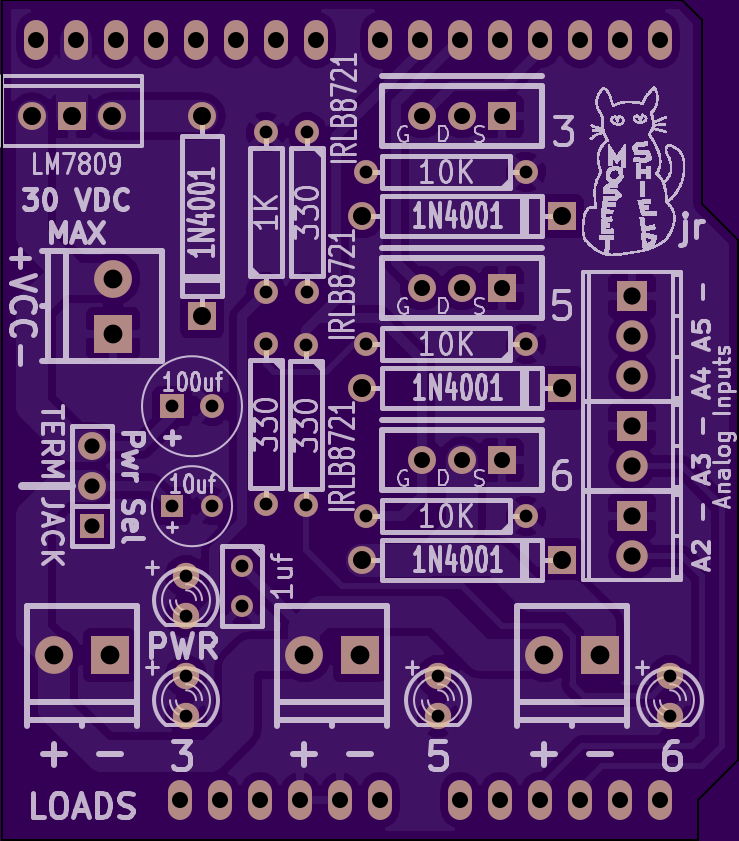
2 layer board of 1.84 x 2.10 inches (46.8 x 53.4 mm)
Uploaded:
December 31, 2014
Shared:
December 31, 2014
Total Price:
$19.35
Instructions @ Instructables.com
MOSFET Jr Arduino Shield allows you to control up to 30 VDC at several amps to power to devices with higher voltages and current than Arduino alone can supply. This could be something like:
- PWM control of the three channels of an RGB LED strip.
- Motor or Fan.
- Solenoid.
Power Up to 30 VDC can be connected to a two-position terminal or 12 VDC through the Arduino’s 2.1mm DC jack. Terminals allow easy connection to loads, and optional terminals allow quick connection for analog sensors that might be used to trigger loads.
Not sure about making a kit? We’ve made it as easy a possible to assemble. Check out the detailed instructions at Instructables.com. For a few bucks more, I’ll build and test it for you, but where is the fun in that?
What you get:
- 1 - PCB board, designed and manufactured in Oregon!
- 3 - MOSFET IRLB8721
- 1 - Power Input Terminal Block 3.5MM 2POS
- 1 - LM7809 Voltage regulator
- 1 - 100 uf 35V Cap
- 1 - 10 uf Cap
- 1 - 1 uf Cap 50V
- 3 - Diode 1N4001
- 3 - 10K resistor, 1/8W
- 1 - 1K resistor, 1/8W
- 3 - 330 resistor, 1/8W
- 1 - 3mm LED, red
- 3 - 3mm LED, green
- 1 - power shunt
- 1 - 40POS MALE CONN HEADER
Optional Items
- 3 - Output terminal blocks 3.5MM 2POS
- 2 - Analog terminal blocks, 2 POS
- 1 - Analog terminal block, 3 POS
- Heat sync
