CC3D barometer, compass, gps, OLED addon board
author: spikey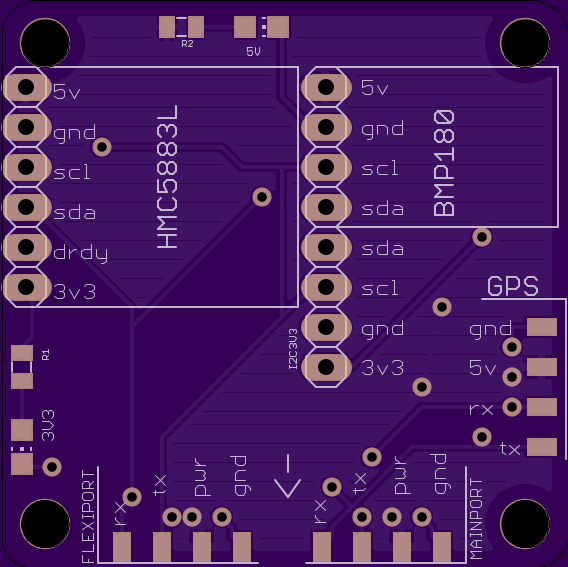

2 layer board of 1.42 x 1.42 inches (36.0 x 36.0 mm)
Uploaded:
May 04, 2015
Shared:
May 04, 2015
Total Price:
$10.05
Barometer, magnetometer, GPS and I2C breakout board for CC3D on Cleanflight. You can also plug in an OLED display and GPS. Board size is the same as CC3D (36x36mm), and so is the hole placement (30,5mm apart). Measurements (link to wiki.Openpilot.org) Male headers are meant to be soldered as SMD, except for 3v3 I2C, which is through hole. You can also solder 90degree headers poiting up. SMD jst connectors are on the bottom side, if you dont want to use headers. Pinouts for jsts are the same as their top side counterparts. The direction is marked with “->” sign, poiting towards MAIN and FLEXI ports. Pinouts for MAIN and FLEXI are the same as on CC3D, dont switch rx and tx. If you want to connect it to a computer, you have to plug the battery to power the addon board, otherwise the virtual USB wont show up in Configurator. It works, I still use the prototype board on my big quad. !Make sure to correctly set the port settings!
Baro and mag bought from the interwebz
How the prototype sits on my quad Proto1 Proto2
Eagle Files can be downloaded from my blog spikey.si
here are two renderings
