Halibut Transport v1.0a
author: SmittyHalibut
2 layer board of 3.76 x 2.21 inches (95.4 x 56.0 mm)
Uploaded:
November 22, 2016
Shared:
November 22, 2016
Total Price:
$41.40
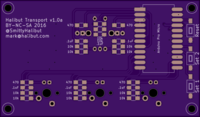
A USB “keyboard” with just the Media keys. Really, you can program it for any keys you want, but I built it for the media keys my keyboard doesn’t have.
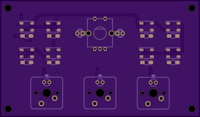
- Buttons are PCB mount Cherry MX switches, of your favorite color. I like Browns
- You’ll probably also want some key caps. This kit includes several options for media keys.
- The rotary encoder is also a pretty common part, but here’s an example.
- Microcontroller is an SparkFun Pro Micro
- The socket is a 24 pin “wide” socket, with the pins bent out so they can be soldered surface mount. It’s easier with the cheaper sockets rather than the really nice machined pin sockets.
- Buttons are pretty standard SMD 6x3x4.3mm buttons, for example.
- Passives are all standard 1206 bits, as marked on the board. Nothing is critical, 5% resistors and 10% caps are fine. Use your cheap crap here, not your good 1% components.
- I’m realizing I didn’t label the bypass caps next to the WS2812Bs. They’re all .1uF, like all the other caps on the board.
- The LEDs in the Cherries and immediately on either side of the rotary encoder are standard 3mm LEDs of your favorite color.
- The RGB LEDs on the “controls” side of the board are WS2812B (The Adafruit link provided are SK6812, but they’re compatible.)
- The board is sized to fit in my favorite cheap plastic project case. Having said that, I think I’m going to make a laser cut wooden panel to sandwich the PCB with stand-offs. I’ll post a link here when I’ve done something.

