ESP-1-BB v0.1
author: SmittyHalibut
2 layer board of 1.08 x 0.76 inches (27.5 x 19.2 mm)
Uploaded:
December 24, 2015
Shared:
December 24, 2015
Total Price:
$4.05
NOTE: The 30uF spec’d on the board is not sufficient to let an (read: my) FTDI serial cable (mine is actually PL2032) power the ESP8266. The ESP draws down the power line too much and the serial chip looses sync with my PC’s USB host controller. Either add more bypass caps (100uF or so?), or power it from an external 3.3v power source.
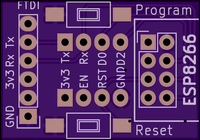
An ESP-1 ESP8266 breakout board. Includes:
- Pins spaced for breadboard use
- An FTDI serial header
- Reset and Program buttons
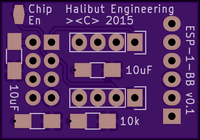
- Optional solder-blob chip enable
- 10k pull-up on Reset
- 3x 10uF power bypass caps (needs more than this if you intend to power it from your serial cable)
To put the ESP8266 into the programming state, push and hold the Program button, then push and release the Reset button, then release the Program button. The ESP8266 is now in Program mode and appears to stay there until you upload your program.

